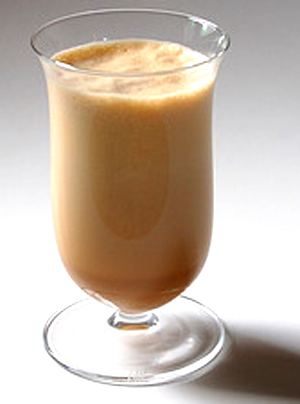
Hot coffee, Irish Cream, Irish whisky, sugar and heavy cream...come on y'all. It can't get much better than that. Unless of course you have a couple, and then you start calling it Caife Gaelach,which just sounds like it's awesome. It originated in Ireland, where there are a variety of claimants for the crown of inventor. But it's generally agreed that nearly frozen American tourists were given a nice friendly jot of Irish Whisky in a cup of coffee to warm them up. Can we give a big hurrah for Irish hospitality?
Unless...and here's the kicker with this lovely little adult beverage - you use cheap ingredients. This is one of those times when there are so few ingredients, that each one needs to be the best you can obtain. I personally like this with a heavy French Roast coffee, homemade Irish cream, brown sugar and a layer of nice heavy cream. One trick to this? Make sure you use sugar in the coffee - otherwise the cream won't float on top. And when adding the cream, pour it carefully over the back of a spoon so it will layer correctly on top of the coffee. If you don't, the cream will just mix into the coffee, and then you've messed it up. The penalty is to drink it yourself and start over. Uh...yeah.

Share1Tweet thisYour Hub URL:
http://hubpages.com/hub/Irish-Coffee-I
Short Hub URL:
http://hubpages.com/t/22433a
remove this messageeditstatsdeletesuggest links closeLoading ...Irish Coffee I50
rate or flag this pageTweet thisBy DixieMockingbird
Caffeine and Whisky! Woo hoo!
Hot coffee, Irish Cream, Irish whisky, sugar and heavy cream...come on y'all. It can't get much better than that. Unless of course you have a couple, and then you start calling it Caife Gaelach,which just sounds like it's awesome. It originated in Ireland, where there are a variety of claimants for the crown of inventor. But it's generally agreed that nearly frozen American tourists were given a nice friendly jot of Irish Whisky in a cup of coffee to warm them up. Can we give a big hurrah for Irish hospitality?
Unless...and here's the kicker with this lovely little adult beverage - you use cheap ingredients. This is one of those times when there are so few ingredients, that each one needs to be the best you can obtain. I personally like this with a heavy French Roast coffee, homemade Irish cream, brown sugar and a layer of nice heavy cream. One trick to this? Make sure you use sugar in the coffee - otherwise the cream won't float on top. And when adding the cream, pour it carefully over the back of a spoon so it will layer correctly on top of the coffee. If you don't, the cream will just mix into the coffee, and then you've messed it up. The penalty is to drink it yourself and start over. Uh...yeah.
Ingredients
Might as well brew a whole pot of coffee. No telling how many times you'll have to do this to get it right.
You'll need:
•1 (1 1/2 ounces) jigger Irish cream liqueur
•1 (1 1/2 ounces) jigger Irish whiskey
•1 cup (6-8 ounces) hot brewed coffee
•1 teaspoon heavy cream
•1 tablespoon heavy cream
•1 dash ground nutmeg

2.Fill mug with coffee. Add sugar and stir well.
3.Carefully, using the back of a spoon as a break, pour cream on top of the coffee.
4.Top with a dash of freshly grated nutmeg.